
SDX 3.2.5 Release Notes
Adding a Trip
| Dispatch > Adding a Trip |
Trips can be added in the Dispatch Module in the Scheduler tab by clicking .
.
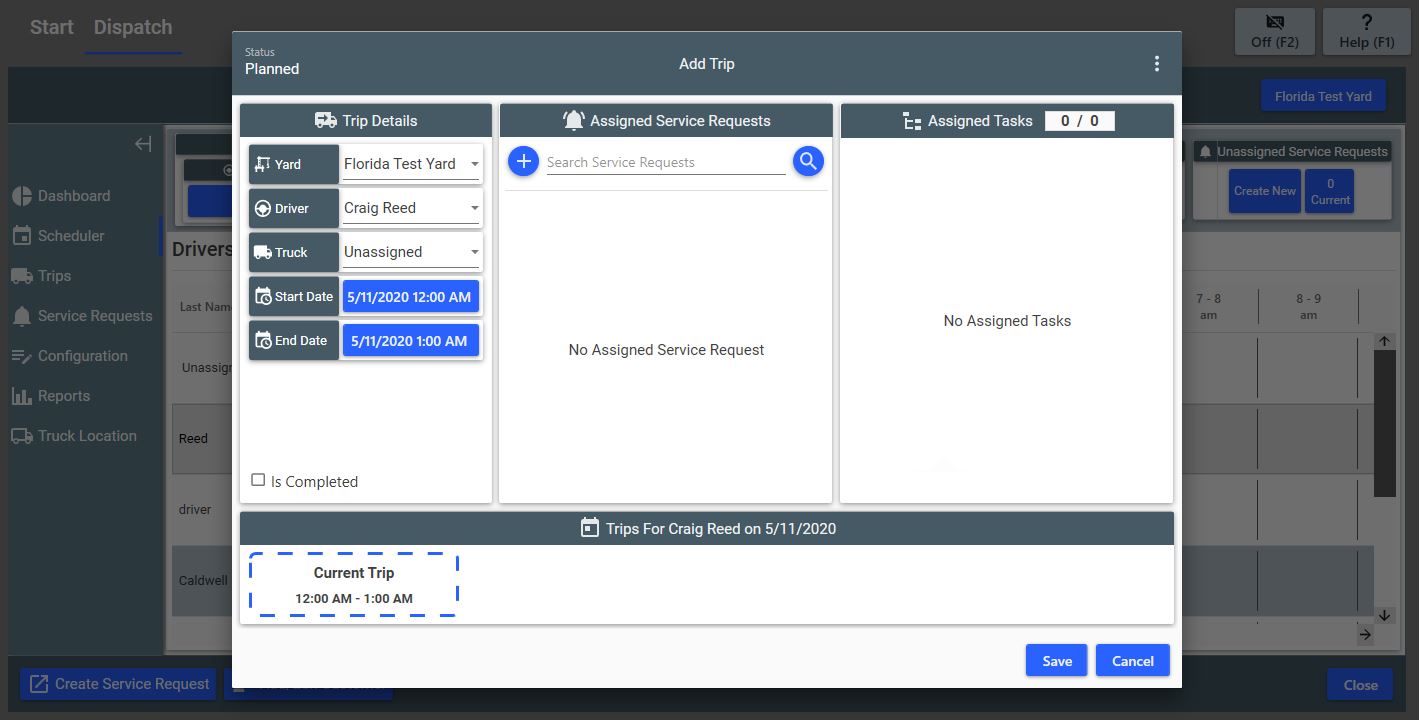
Doing so will open the Add Trip Dialog Box. Like other screens in Scrap Dragon X, the Dialog Box is borken up into multiple Sections: Trip Details, Assigned Service Requests, and Assigned Tasks. If the trip is being added for a specific driver, like in the example shown above, a fourth section of the Dialog Box displays showing trips for that driver on the date specified in the Scheduler. If the trip is not assigned to a specific driver in the Scheduler the Trips for that driver will not display at the bottom. In the example above, the Current Trip is the trip currently being created and not an already existing trip.
The trip can be set up as a Recurring Event by clicking the vertical ellipses in the top right hand corner of the Add Trip Dialog box.
Trip Details
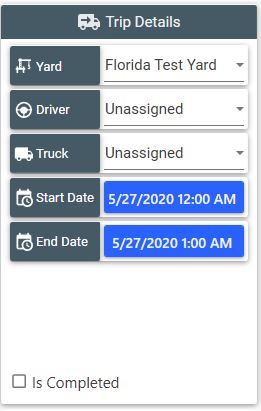
The Trip Details section of the Add Trip Dialog Box offers dropdown menus where you can set the Yard the trip is associated with, the Driver the trip is assigned to, the Truck the trip is assigned to, and fields where the Start and End Dates for the trip can be selected from a popup calendar. If the Add Trip button in a row for a specific driver is used, that driver's name will automatically appear in the Driver field.
Assigned Service Requests
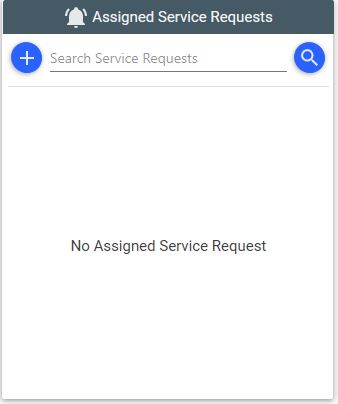
The Service Request associated with this trip can be assigned or created from the Assigned Service Requests box in the Add Trip Dialog Box. To assign an existing Service Request, search for the Service Request and then click the  icon.
icon.
To create a Service Request that this trip will be associated with click the  icon. More information on creating a Service Request can be viewed on the Service Requests page of this Help Document.
Assigned Tasks
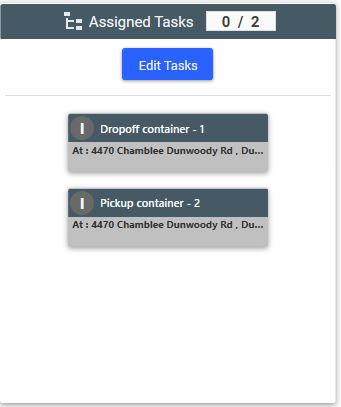
The Assigned Tasks section of the Add Trip Dialog Box displays any tasks associated with the trip. These tasks are set by the Service Request. If there are tasks assigned to the trip they will display, and can be edited using the Edit Tasks button.
Once the Trip is created, save the trip using the Save Button in the bottom right hand corner.
Opening up the Trips Dialog Box on an existing trip will display a number of buttons in the bottom right hand corner that are not displayed when creating a new trip. These buttons are discussed in the table below:
 |
Merges with another trip, selectable through the Trip List. |
 |
Opens JPEGger and displays images associated with this trip. |
 |
Displays the Print Preview. |
 |
Prints the Trip Details. |
 |
Saves changes made to the trip. |
 |
Voids the trip. |
 |
Cancels out of the Trip Dialog box, cancelling any changes. |